
Salon appointments cost between £60 and £150 for a full colour, and you need to rebook every six to eight weeks. That’s before factoring in travel time, waiting around, and hoping the stylist understands what you actually want. Learning how to colour your hair at home gives you control over your look, your budget, and your schedule—without compromising on results.
Modern home hair colour formulas are nothing like the patchy box dyes of the past. Today’s kits include plex technology to protect your strands during processing, vegan ingredients free from harsh chemicals like PPD and ammonia, and professional-quality pigments that deliver vibrant, long-lasting colour. With the right technique, you can achieve salon-worthy results from your bathroom.
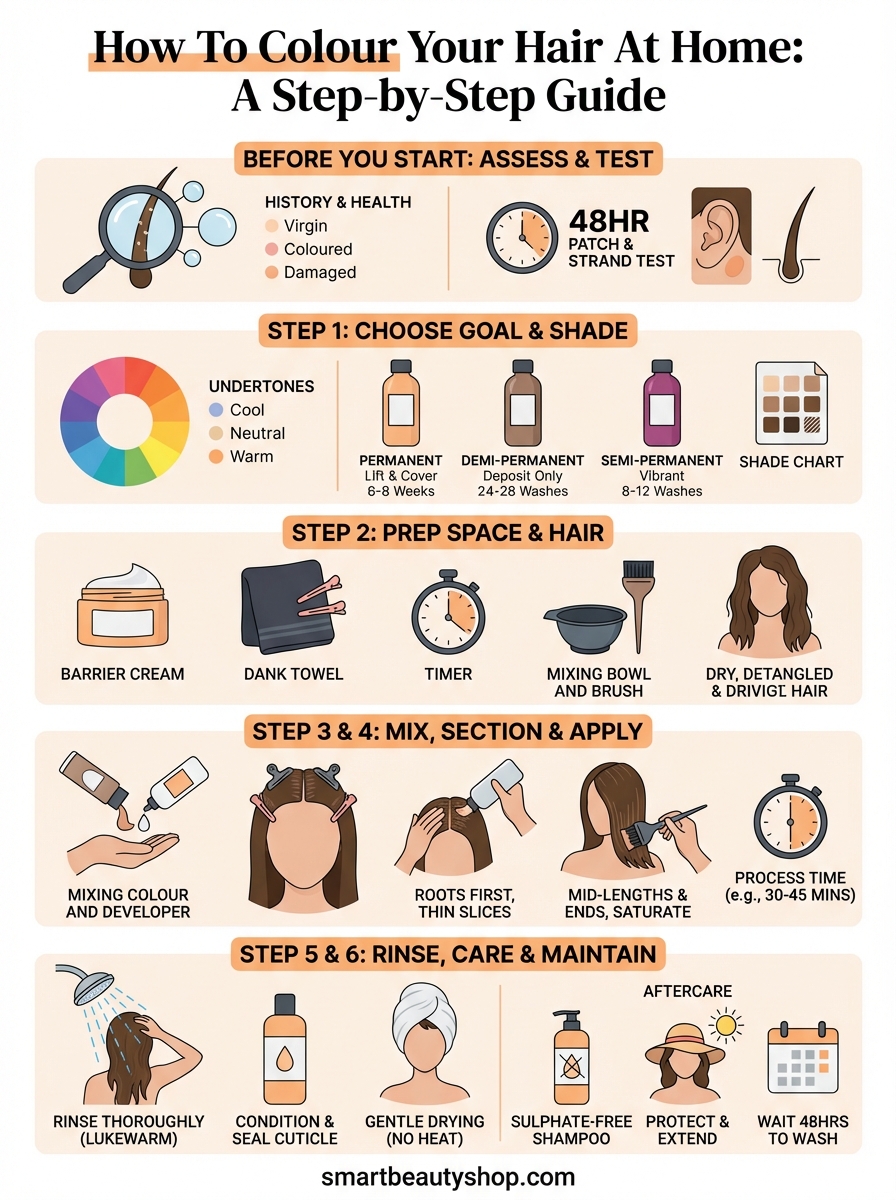
This guide walks you through every step of the process, from choosing your ideal shade to applying colour evenly and caring for your hair afterwards. You’ll learn how to prepare your space, mix and test your formula, and handle common concerns like root touch-ups and colour fading. Whether you’re going bold with a fashion shade or refreshing your natural tone, you’ll have everything you need to colour with confidence.
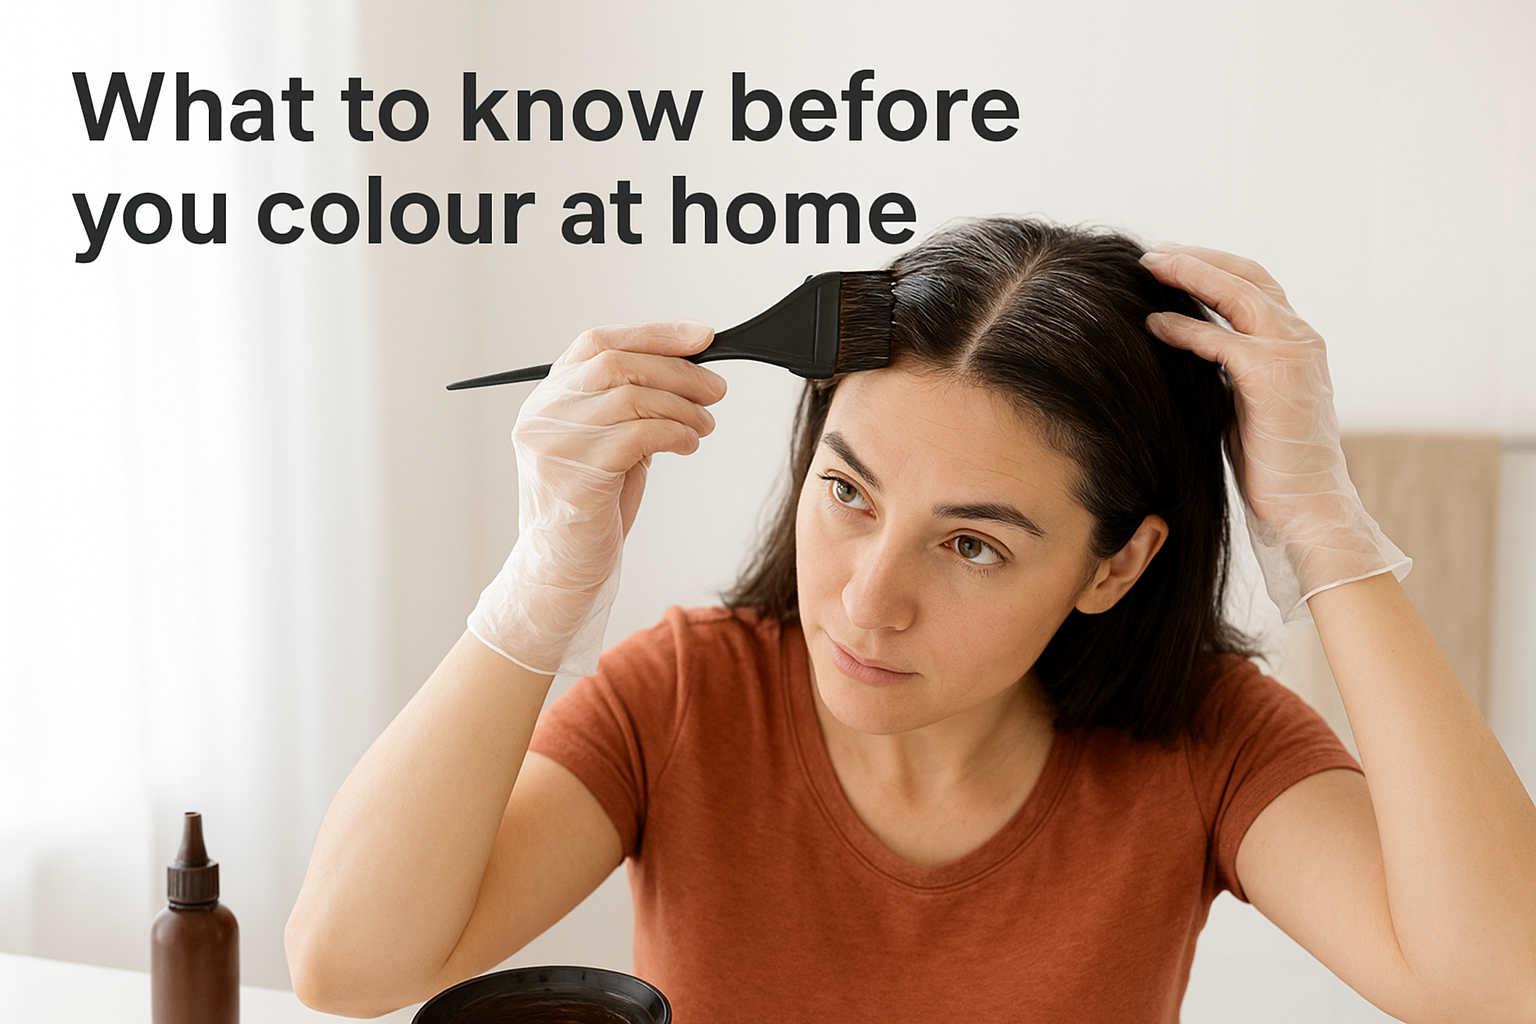
What to know before you colour at home
Your hair’s current condition determines how well it takes colour and how your final shade looks. Virgin hair (never chemically treated) processes differently than hair that’s been dyed, bleached, or permed in the past few months. Damaged strands absorb pigment unevenly, which can lead to patchy results or unexpected tones. Before you open any colour kit, assess what you’re working with so you can choose the right formula and set realistic expectations.
Understanding your starting point makes the difference between disappointing results and colour that lasts.
Check your hair’s history and health
Look at your hair closely in natural light. If you’ve previously coloured or bleached your hair within the last three months, you’re working with sensitised strands that need extra care. Chemical treatments create porosity, meaning your hair absorbs colour faster at the ends than at the roots. You’ll need to adjust your application timing to avoid darker ends. Hair that’s been heat-styled regularly or feels dry and brittle may require a pre-treatment or a gentler demi-permanent formula instead of permanent colour.
Note any breakage, split ends, or scalp sensitivity. Colouring over compromised hair can worsen damage, and applying developer to an irritated scalp causes discomfort. If your hair snaps easily when wet or your scalp shows redness, postpone colouring and focus on strengthening treatments for two weeks first.
Plan your timing and patch test window
Home hair colouring isn’t a last-minute decision. You need 48 hours before your chosen colour date to perform a patch test behind your ear and a strand test on a hidden section of hair. The patch test checks for allergic reactions, while the strand test shows you exactly how the colour will develop on your hair texture and current shade. Skip these steps, and you risk skin irritation or a colour result that’s completely wrong.
Block out two to three hours for your first application, including prep time, processing, and cleanup. Rushing through how to colour your hair leads to missed sections and uneven coverage. Choose a day when you won’t be interrupted, ideally when you can rinse in a well-lit bathroom with easy access to towels and a mirror you can position to see the back of your head.
Step 1. Decide your colour goal and shade
Your colour choice shapes everything that follows, from the formula you need to how often you’ll need touch-ups. Before you browse shade charts, define what you want to achieve. Are you covering grey, going lighter, adding fashion colour, or refreshing your natural tone? Each goal requires a different approach when you learn how to colour your hair at home. A subtle change of one or two shades works with most formulas, but dramatic transformations (like dark brown to platinum) need pre-lightening and more than one session.
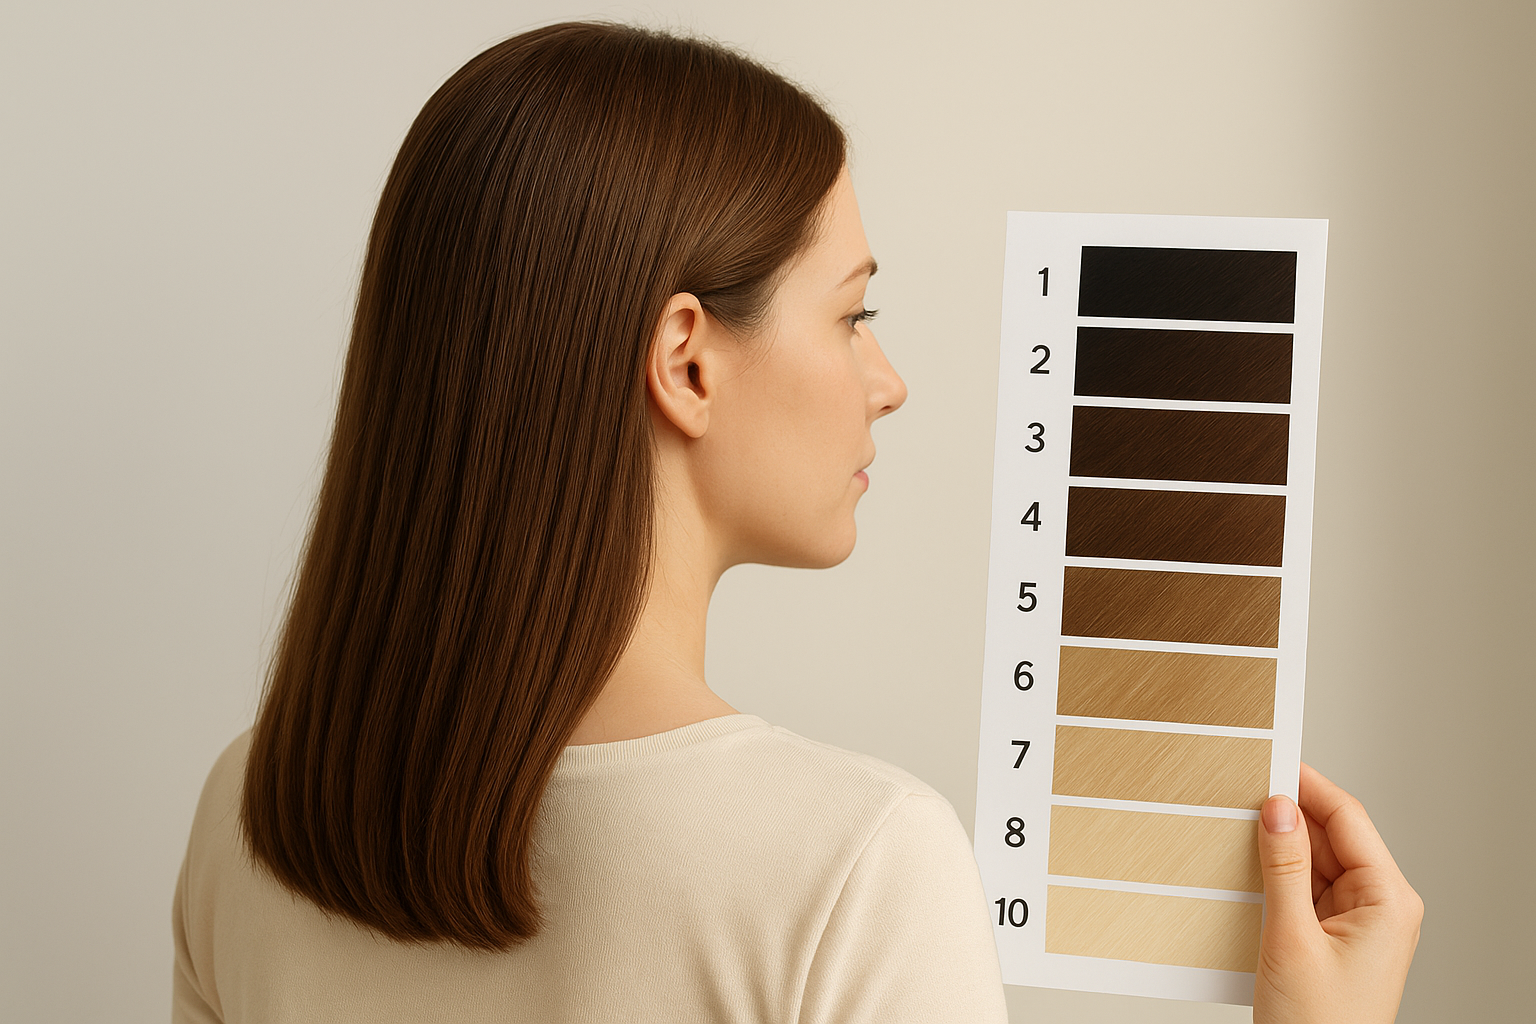
Match your natural depth and undertone
Start by identifying your base level on a scale of 1 (black) to 10 (lightest blonde). Hold sections of your hair against a shade chart in natural daylight, not bathroom lighting. Your base level determines which shades you can reach with standard colour kits. If you’re a level 6 medium brown, you can easily go to level 5 or 7, but reaching level 9 light blonde requires bleach first.
Pay attention to undertones in both your natural hair and your target shade. Hair has warm (gold, copper, red), cool (ash, violet), or neutral undertones. Warm undertones show up as golden or orange tones, while cool undertones lean grey or blue-based. Choose a shade family that either matches your natural undertone for seamless results or deliberately shifts it for a noticeable change. Ash shades cancel warmth, while copper and gold add it.
Matching depth and undertone prevents that telltale "box dye" look and creates colour that suits your complexion.
Consider lifestyle and maintenance commitment
Permanent colour requires root touch-ups every four to six weeks as your natural hair grows out. Fashion shades like bright pink or purple fade faster and need refreshing every two to three weeks to stay vibrant. If you wash your hair daily or swim regularly, expect your colour to fade 30-40% faster than someone who washes twice weekly. Choose a shade you can realistically maintain, or accept that it will evolve over time.
High-contrast colours (like jet black on naturally blonde hair or platinum on dark brunette) show regrowth more obviously than tonal shifts within two shades of your natural colour. Your daily routine matters too. If you use heat tools frequently or spend hours in chlorinated water, factor in extra fading and potential colour shifts when selecting your shade.
Step 2. Choose the right formula and developer
The formula you pick controls how long your colour lasts and how much it changes your base shade. Permanent colour penetrates the hair shaft and stays until it grows out, while semi-permanent formulas coat the surface and fade gradually over several washes. Your choice depends on whether you need long-term coverage or want flexibility to change shades frequently. Most home colouring kits include a developer (also called activator or peroxide) that opens your hair cuticle so pigment can enter. The developer’s strength determines how much lift you get and how deeply the colour sets.
Understanding permanent, demi, and semi-permanent formulas
Permanent colour requires a developer and provides complete coverage of grey hair while lifting your natural shade up to two levels lighter. This formula works when you want a significant change or need reliable grey coverage that won’t wash out. The colour molecules bond inside your hair cortex, creating results that last six to eight weeks before you need root touch-ups. Permanent formulas contain plex technology in modern kits, which strengthens hair bonds during processing to reduce breakage and keep strands smooth.
Demi-permanent colour uses a low-volume developer (usually 10 or 20) and deposits pigment without lifting your natural colour. Choose this option when you want to go darker, enrich your current shade, or blend grey without harsh chemicals. The results fade gradually over 24 to 28 washes, making it perfect for low-commitment colour experiments. Demi-permanent formulas contain no ammonia, so they smell better and feel gentler on sensitive scalps.
Semi-permanent colour works without any developer and simply coats your hair shaft with pigment. This type suits fashion shades, colour correction, or adding vibrancy to pre-lightened hair. The colour washes out over 8 to 12 shampoos, though vivid shades may stain porous hair for longer. You can apply semi-permanent colour as often as you like without chemical damage, making it ideal when you’re learning how to colour your hair for the first time.
Choose your formula based on commitment level and whether you need grey coverage or just want to experiment with tone.
Selecting developer volume for your goal
10-volume developer deposits colour without any lift, keeping you at your current depth while changing tone. Use this strength for going darker, refreshing faded colour, or subtle tonal adjustments. It processes gently and works well on previously coloured or delicate hair that can’t handle stronger formulas.
20-volume developer lifts hair one to two levels while depositing colour, making it the standard choice for most home colouring. This strength covers grey completely and lets you go lighter within reason. Choose 20-volume when you want noticeable change without extreme lightening.
30-volume developer lifts two to three levels and handles stubborn grey or dark hair that resists standard formulas. Use this strength only on virgin hair or when you need significant lightening. Higher volumes dry out hair faster, so follow up with intensive conditioning treatments to restore moisture and prevent brittleness. Never use 40-volume developer at home as it causes severe damage without professional monitoring.
Step 3. Prepare your hair, skin and space
Proper preparation prevents colour stains on your skin, protects your clothes, and creates a workspace where you can focus on application technique. Setting up correctly before you open your colour kit saves you from interruptions mid-process and reduces the chance of uneven coverage. Take 15 to 20 minutes to prepare everything you need within arm’s reach, including towels, clips, gloves, and a timer. Your bathroom or chosen space should have good lighting and a clear surface for mixing your formula. Skipping preparation means scrambling for supplies with colour-covered hands or discovering you forgot something crucial halfway through.
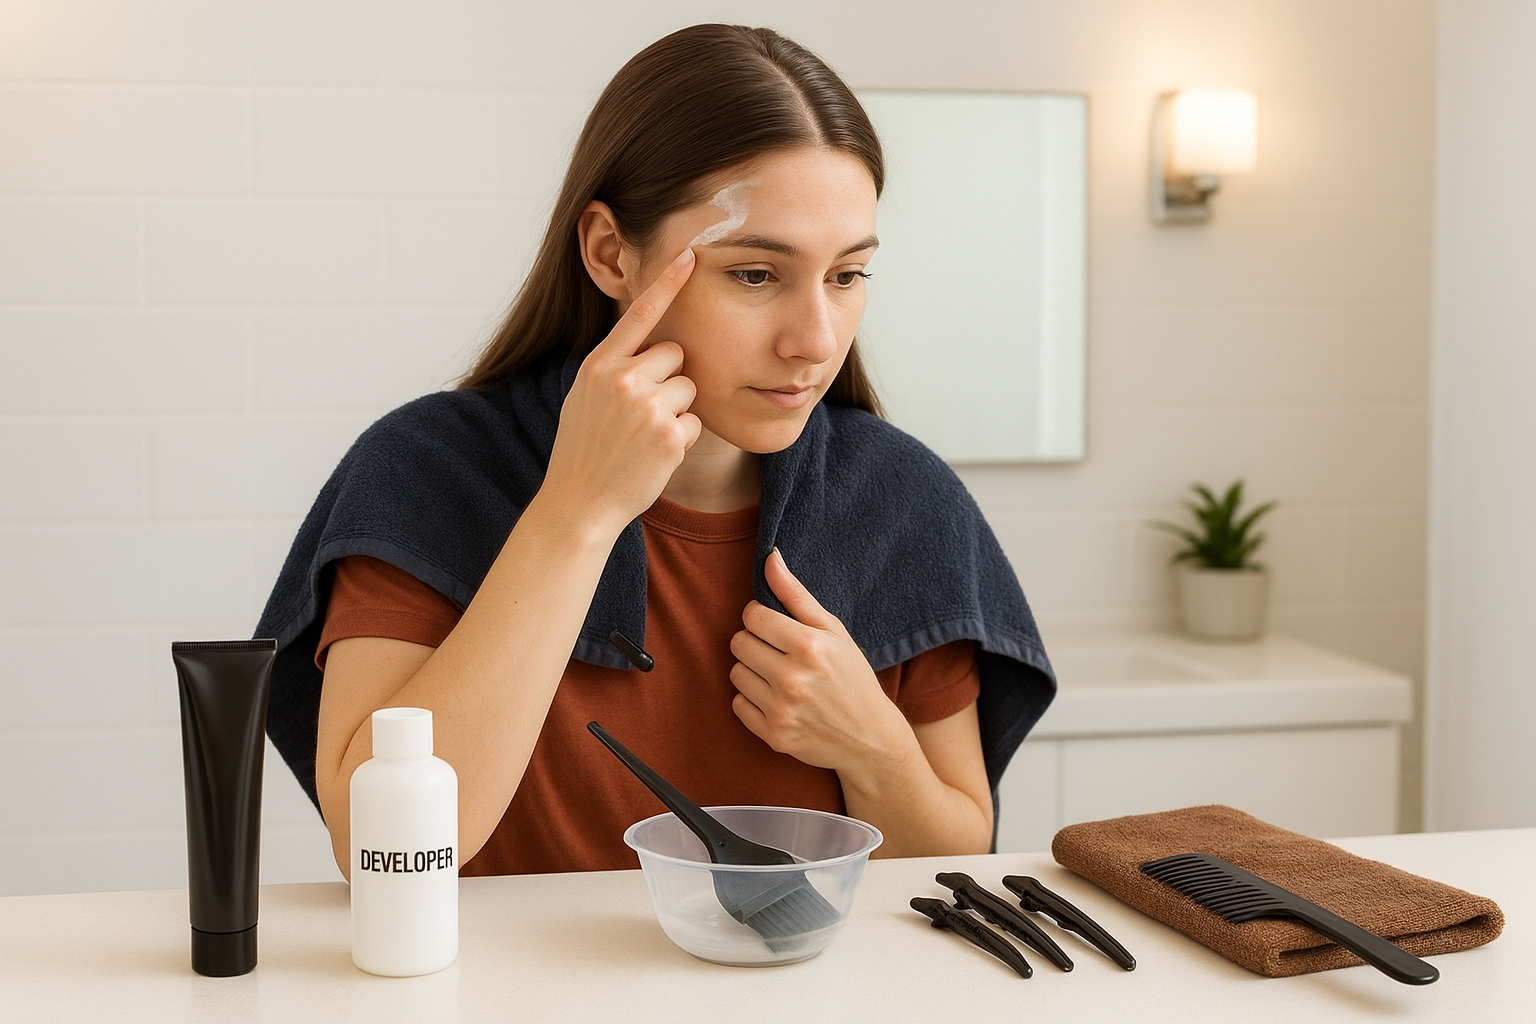
Protect your skin and clothing
Apply a thin layer of petroleum jelly or thick moisturiser along your hairline, behind your ears, and down the back of your neck. This barrier stops colour from staining your skin and makes cleanup easier after rinsing. Focus on the areas where colour drips most often: your temples, the tops of your ears, and your nape. Rub the product in thoroughly so it doesn’t transfer onto your hair and create patches that resist colour.
Wear an old shirt you don’t mind ruining or drape a dark towel around your shoulders, securing it with a clip at the front. Colour formulas stain fabric permanently, even after washing. Choose dark colours (black, navy, or brown) rather than white towels, as they hide accidental stains better. Keep your neck exposed so you can see where your hairline ends and avoid getting colour on the towel itself.
Set up your colouring station
Gather everything you need before you start mixing colour. Lay out these items on your bathroom counter or table:
- Colour kit components (developer, colour tube, gloves)
- Non-metallic mixing bowl and applicator brush
- Sectioning clips (at least 4)
- Wide-tooth comb for parting
- Timer or phone alarm
- Old towels for cleanup
- Plastic wrap or shower cap (if kit doesn’t include one)
- Barrier cream or petroleum jelly
- Clean towel for post-rinse
Place a dark towel on the floor beneath your work area to catch drips. Position a mirror where you can see the back of your head by holding a hand mirror at an angle. Good lighting matters when you learn how to colour your hair, so turn on overhead lights and add a desk lamp if your bathroom feels dim.
Setting up a complete station before you mix colour means you won’t interrupt the application process to hunt for supplies.
Prep your hair condition
Start with dry, unwashed hair that hasn’t been washed for 24 to 48 hours. Your scalp’s natural oils create a protective barrier that reduces irritation from the developer. Brush through your hair thoroughly to remove tangles, as you won’t be able to comb through it easily once colour is applied. Detangle from ends to roots using a wide-tooth comb to prevent breakage.
Check that your hair is completely dry. Damp hair dilutes the colour formula and prevents even coverage, leading to patchy results. If you showered recently, blow-dry your hair on a cool setting until no moisture remains. Remove any styling products like hairspray, mousse, or dry shampoo by brushing vigorously, as product buildup blocks colour absorption.
Step 4. Mix, test and section your hair
This step determines whether your colour turns out exactly as expected or leaves you with patchy coverage and unexpected tones. Mixing your formula correctly activates the pigment molecules and ensures they penetrate evenly, while testing protects you from allergic reactions and colour surprises. Taking 15 to 20 minutes to mix, test, and section properly prevents hours of disappointment later. You’ll apply colour more efficiently when your hair is divided into manageable sections, and you’ll avoid the common mistake of missing patches at the back of your head.
Mix your colour formula precisely
Put on your disposable gloves before handling any colour or developer. Squeeze the colour tube completely into your non-metallic mixing bowl, then add the developer according to the ratio specified in your kit instructions. Most permanent formulas use a 1:1 ratio (equal parts colour and developer), while some demi-permanent kits require 1:2. Stir thoroughly with your applicator brush for 60 to 90 seconds until the mixture reaches a smooth, creamy consistency with no streaks or lumps.
Check your formula’s texture. It should coat the brush thickly without dripping off immediately. If the mixture feels too runny, you’ve added excess developer and may get lighter results than expected. Mix only what you need for immediate application, as the formula begins working the moment you combine the components. For shoulder-length hair, one standard kit provides enough coverage. Longer or thicker hair requires two kits mixed separately.
Perform patch and strand tests
Apply a coin-sized amount of mixed colour behind your ear using a cotton bud, covering an area about the size of a 10p piece. Leave it on for the full processing time stated in your instructions (usually 30 to 45 minutes), then rinse off. Wait 48 hours and check the test area for redness, itching, swelling, or irritation. Any reaction means you cannot use that formula and need to find an alternative product.
Choose a small section of hair from underneath your head, near the nape where it won’t show if the result goes wrong. Apply colour from root to tip, wait the recommended processing time, and rinse. This strand test shows you the exact shade you’ll achieve and whether you need to adjust timing. If the colour develops too light, add five minutes to your processing time. If it’s too dark, reduce processing by five minutes.
Testing takes patience, but it’s the only way to guarantee your colour will work with your specific hair chemistry.
Section hair for even coverage
Create a centre parting from your forehead to the nape of your neck, dividing your hair into left and right halves. Clip the right side away. Take the left section and create a horizontal parting from the top of your ear across to the centre back, splitting that half into top and bottom sections. Clip both sections separately. Repeat this process on the right side, giving you four equal quadrants. For thick hair, divide each quadrant again horizontally, creating eight sections total. Number them mentally (front left, front right, back left, back right) so you remember where you started when learning how to colour your hair systematically.
Step 5. Apply your colour from roots to ends
Application technique affects your final result more than any other factor in the colouring process. Working systematically through your sections ensures complete coverage without missing patches, while your timing controls how evenly the colour develops. Start your timer the moment you finish applying colour to your first section, not when you complete your entire head. This approach accounts for the fact that your first section will have been processing longer than your last, preventing uneven results. Always apply more product than you think you need, as skimping on formula creates lighter, patchy areas that stand out once your colour sets.
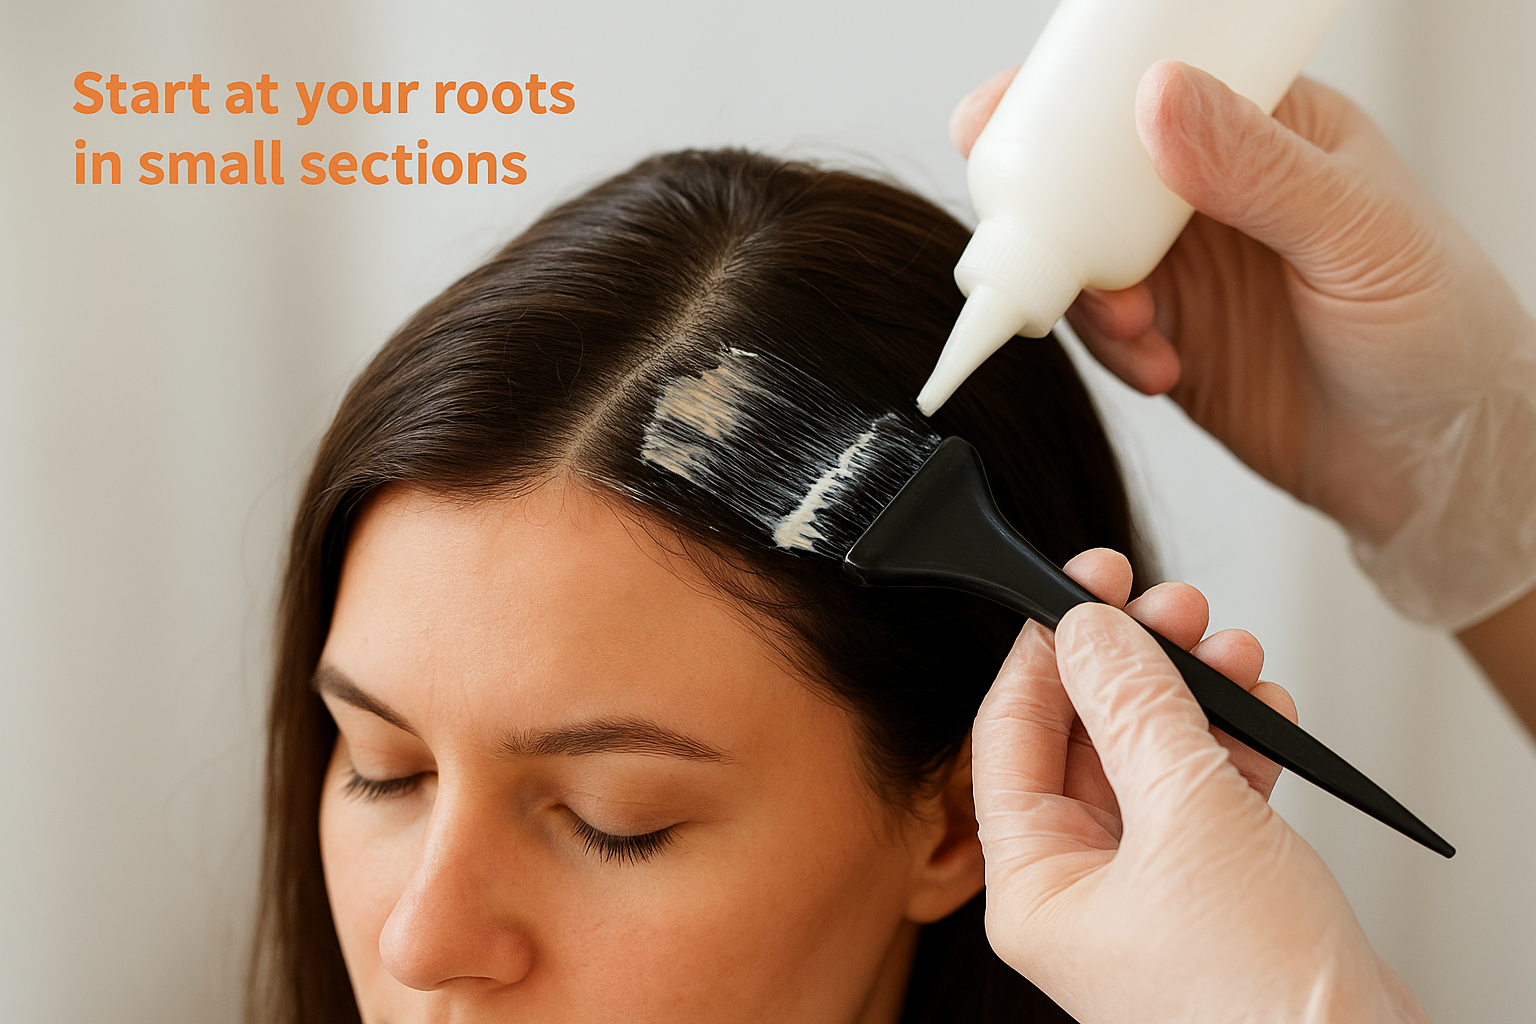
Start at your roots in small sections
Unclip your first section (front left quadrant works best as you can see it easily) and take a horizontal slice about half a centimetre thick from the bottom of that section. Apply colour directly to your roots using the applicator bottle nozzle or brush, working in short strokes from scalp to about two centimetres down the hair shaft. Press the colour into your parting with your gloved fingers to ensure the scalp is covered, as this area processes slowest. Complete all root work in this subsection before moving to the next slice above it.
Work upwards through your section, taking thin horizontal slices and applying colour to the roots only. Your parting lines need the most attention because they show most visibly when your hair falls naturally. Once you’ve covered all roots in that quadrant, move to the adjacent section and repeat the process. Save the back sections until you’ve finished both front quadrants, as they’re harder to reach and you’ll work more slowly. This systematic approach to how to colour your hair prevents you from losing track of which areas you’ve covered.
Thin sections and thorough root saturation eliminate the patchy regrowth that ruins home colour jobs.
Work through mid-lengths and ends
After completing root application across all four sections, return to your starting quadrant and apply colour to your mid-lengths and ends. Take the same thin horizontal slices you used for roots and pull colour through from where your root application stopped down to your tips. Use your fingers to squeeze and distribute the colour evenly along each strand, ensuring complete saturation. Previously coloured hair requires less processing time than virgin roots, so you’re deliberately applying this area second to prevent over-processing and darker ends.
Comb through each section with a wide-tooth comb once you’ve applied colour to redistribute the formula and eliminate any gaps. Your hair should look thoroughly saturated, with colour visibly coating every strand from root to tip. Add extra product to areas that look thin or patchy rather than hoping they’ll even out during processing.
Check coverage and set your timer
Walk around your head one final time, checking your part lines, hairline, and nape for missed spots. Use your hand mirror to inspect the back sections thoroughly, adding colour wherever you spot gaps. Pull your hair into a loose pile on top of your head and cover it with a plastic cap or wrap if your kit includes one. This traps heat and helps the colour process evenly. Note your start time and set a timer for the processing duration stated in your instructions, typically 30 to 45 minutes. Check the colour every 10 minutes by wiping a small section clean with a damp cloth to monitor how it’s developing.
Step 6. Rinse, condition and dry your hair
The rinsing stage removes excess colour without stripping the pigment you’ve just deposited, while conditioning seals your hair cuticle and locks in your new shade. Rushing through this step leaves colour residue that transfers onto towels and pillowcases, while skipping proper conditioning creates dry, brittle strands that fade faster. Your technique during these final minutes determines whether your colour looks vibrant and professional or dull and patchy. Allocate 15 to 20 minutes for thorough rinsing, conditioning, and initial drying to protect your investment of time and product.
Rinse thoroughly with lukewarm water
Stand in your shower or lean over your bath and rinse your hair with lukewarm water until it runs completely clear. Hot water opens your cuticle too much and allows freshly deposited pigment to escape, while cold water doesn’t remove enough residue. Start at your hairline and work backwards, using your fingers to massage your scalp gently and release any colour buildup. The water will run bright with colour initially, then gradually lighten as you continue rinsing. Keep going for three to five minutes past the point where you think you’re done, as residual colour hides in thick sections and around your nape.
Squeeze sections of your hair as you rinse to push trapped colour out from the mid-lengths. Pay extra attention to areas where you applied more product, as these spots hold colour longer. Your hair should feel smooth and slightly slippery when you’ve rinsed adequately. Any tackiness or rough texture means colour remains in your strands.
Thorough rinsing prevents colour transfer and sets the foundation for how long your shade will last.
Condition and seal your cuticle
Apply the conditioning treatment included in your colour kit, working it through from mid-lengths to ends. Avoid your roots for the first minute, as they received the most chemical processing and need less heavy conditioning. Comb the conditioner through with your fingers or a wide-tooth comb to distribute it evenly across every strand. Leave it on for the recommended time stated in your instructions (typically three to five minutes) before rinsing thoroughly with cool water. Cool water seals your cuticle, trapping colour molecules inside and adding shine to your finished result.
Dry gently without heat
Squeeze excess water from your hair using a clean, dark towel rather than rubbing vigorously. Rough towel-drying damages freshly processed hair and causes frizz. Wrap your hair in the towel and leave it for five minutes to absorb water naturally. Let your hair air-dry completely if possible, as heat styling within the first 48 hours can cause colour to fade prematurely. When you must use a hairdryer, apply a heat protectant first and keep the setting on cool or low heat to preserve your colour’s vibrancy.
Care and quick fixes after colouring
Your colour looks perfect now, but maintaining that vibrancy requires specific aftercare in the first 72 hours and a modified routine going forward. The first 48 hours after you learn how to colour your hair determine how long your shade lasts and how healthy your hair remains. Your cuticle stays slightly open during this period, making your hair vulnerable to fading and damage from heat, chlorine, and harsh products. Taking protective steps immediately after colouring extends your colour by three to four weeks and keeps your hair feeling soft rather than dry and straw-like.
Extend your colour’s lifespan
Wait 48 hours before washing your hair again to allow the colour molecules to fully bond with your hair shaft. Use lukewarm or cool water for all washes, as hot water opens your cuticle and releases pigment with each rinse. Switch to a sulphate-free shampoo designed for colour-treated hair, as sulphates strip colour faster than any other factor. Wash your hair only two to three times weekly instead of daily to preserve your shade’s intensity.
Apply a colour-depositing conditioner once weekly to refresh your tone between full colour applications. These products add small amounts of pigment while conditioning, counteracting the natural fading that happens over time. Protect your hair from UV damage by wearing a hat in strong sunlight or using a leave-in treatment with UV filters, as sun exposure fades colour and creates brassy tones in blonde and brown shades.
Regular maintenance with the right products keeps your colour looking freshly applied for six to eight weeks instead of three.
Fix common colour problems quickly
Brassy orange or yellow tones appear in blonde and light brown hair as cool pigments fade first. Apply a purple or blue toning shampoo twice weekly to neutralise warmth. Leave the product on for three to five minutes before rinsing to deposit enough pigment for visible correction.
Patchy coverage from missed sections needs spot treatment with leftover formula within 24 hours of your initial application. Mix a small amount of colour and apply only to the light patches, processing for half the original time.
Darker-than-expected results fade gradually with frequent washing using a clarifying shampoo. Wash your hair daily with hot water for three to five days to strip excess pigment. For severe darkening, use a colour remover product specifically designed to lift artificial pigment without damaging your hair structure.
Stained skin around your hairline responds to rubbing alcohol applied with a cotton pad or a paste made from baking soda and water. Scrub gently in circular motions until the stain lifts, then moisturise immediately to prevent dryness.
Your at home hair colour plan
You now have the complete process for transforming your hair colour successfully at home. From choosing your shade and mixing your formula to applying colour systematically and caring for your results, each step builds on the last to create professional-quality colour without the salon price tag. The preparation and technique you’ve learned eliminate the guesswork that causes patchy results and colour disasters.
The method matters more than expensive products when you learn how to colour your hair. Following the systematic sectioning and thorough application outlined here produces consistent results every time. Your confidence grows as you refine your technique and understand how your hair responds to different formulas and processing times.
Start with a shade close to your natural colour for your first attempt, then experiment with bolder choices once you’ve mastered the basics. Explore our Creative Colour System for high-impact shades that deliver vibrant results while protecting your hair’s health and integrity.